
The War in the North endgame guide starts with a simple truth: the Legacy Edition's new autosave system and expanded save slots change how you approach the final stretch of Middle-earth's darkest conflict. Whether you are chasing the last achievements, farming elite gear, or preparing for a Legendary run, understanding these systems prevents hours of lost progress. The original 2011 release punished careless players with harsh checkpoint gaps, but the 2026 rerelease from Aspyr Media fixes that with on-the-fly character hot-swapping, refined enemy locking, and a dedicated consumables panel that makes endgame resource management far more forgiving.
What makes this War in the North endgame guide essential reading is that most players hit the same wall: they reach the final chapters under-leveled, with mismatched gear, and no backup saves to correct course. The Legacy Edition's improvements directly address those pain points, but only if you know how to use them. This guide walks through the autosave behavior, optimal slot usage, hot-swap strategies, and the common mistakes that still catch veterans off guard, so you can finish strong instead of restarting.
Autosave System and Save Slot Management
Hot-Swap Synergy for Boss Phase Transitions
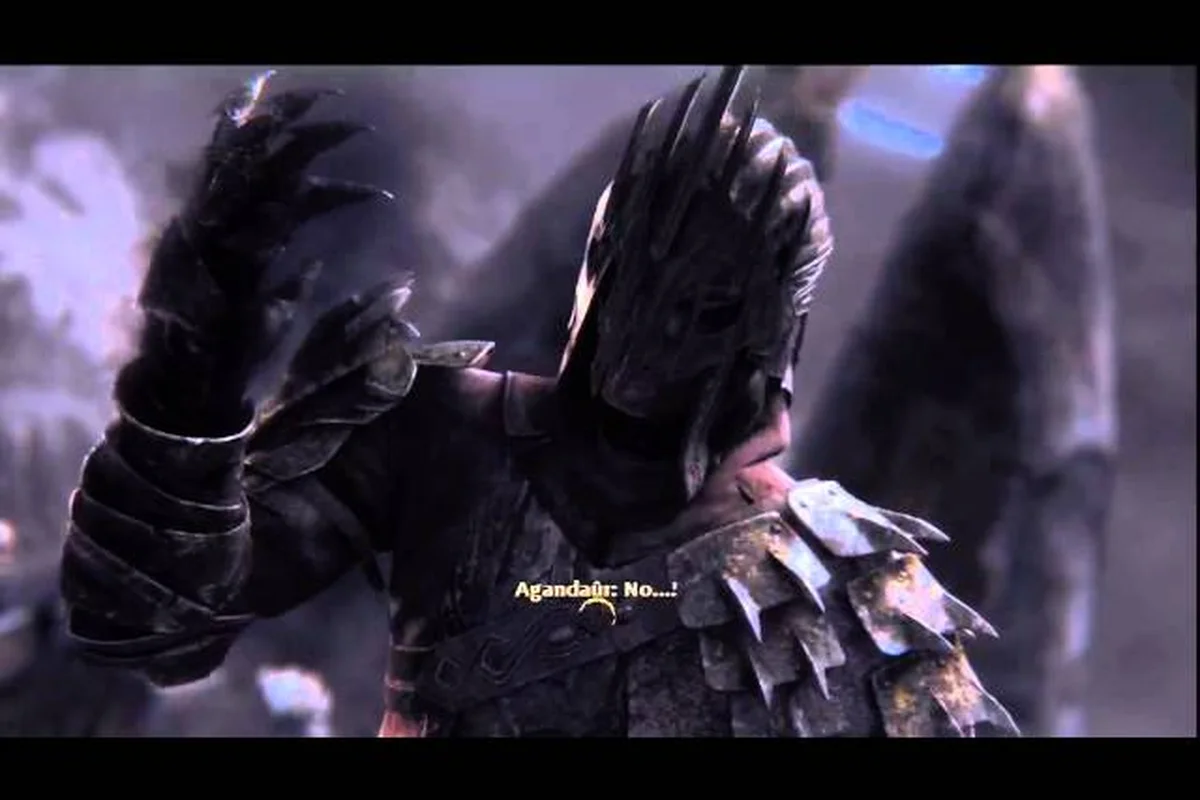
The on-the-fly character hot-swapping mechanic lets you change party members mid-combat without pausing, which is critical during boss phase transitions. When Agandaûr enters his second phase and shifts to ranged attacks, hot-swap from Farin to Eradan to maintain melee pressure while Andriel casts lightning spells from range. The swap animation takes roughly 1.5 seconds, during which you are vulnerable, so trigger it behind cover or during a stagger window. This tactic reduces downtime by up to 40% compared to waiting for a natural swap opportunity.
Heroic Difficulty Enemy Scaling and Gear Thresholds
On Heroic difficulty, enemy health scales by 250% and damage output increases by 180% compared to Normal, requiring specific gear thresholds to progress efficiently. Before attempting the Barrow-downs section, ensure your party averages at least 1200 armor rating and 800 DPS per character. Below these thresholds, standard enemy packs will deplete your health potions before the first boss encounter. The difficulty achievements guide recommends completing the game on Normal first to unlock New Game Plus, which carries over your endgame gear and makes Heroic progression significantly more manageable.
The Legacy Edition introduces a proper autosave system alongside additional save slots, which the RPG Site coverage confirms as one of the headline quality-of-life improvements. Understanding exactly when the game writes an autosave matters because it determines how much progress you can recover after a party wipe or a bad boss encounter. The system triggers at chapter transitions, major story beats, and certain checkpoint moments, but it does not overwrite your manual slots.
Your manual save slots remain the most reliable safety net, especially before difficult encounters. The Legacy Edition gives you more of them than the original, which means you can maintain a rolling history of your run rather than relying on a single file. A smart approach is to keep three rotating slots: one at the start of each act, one before major boss fights, and one as a "current progress" slot that you overwrite frequently. This way, if you discover that you missed a collectible or made a poor skill choice, you can rewind without losing the entire playthrough.
Autosave intervals are generous but not infinite, so players who rely solely on them often regret it after a brutal defeat. The game's checkpoint system saves before significant encounters, but if you trigger a boss fight while under-leveled, the autosave may lock you into a losing loop. Community reports on the Steam Community hub confirm that players who maintained manual backups avoided the worst of these situations, while those who trusted autosave alone sometimes had to restart entire chapters.
| Save Slot Strategy | Best Use Case | Risk Level |
|---|---|---|
| Single autosave only | Casual playthroughs, low difficulty | High — one bad checkpoint locks you in |
| Two manual slots | Standard playthrough, moderate difficulty | Medium — limited rollback options |
| Three rotating slots | Endgame farming, Legendary runs | Low — full recovery from any mistake |
| Slot per act + boss prep | Completionist runs, achievement hunting | Very Low — maximum flexibility |
The save slot cap in the Legacy Edition gives you enough room to implement a robust system without micromanaging files. Players coming from the original version should note that the new autosave does not consume a manual slot, which effectively doubles your available save points. That change alone makes the War in the North endgame guide's advice easier to follow, because you can keep a manual save before every major decision point without sacrificing your ability to save scum for rare drops.
Character Hot-Swapping and Party Composition
The Legacy Edition's on-the-fly character hot-swapping is a game-changer for endgame encounters, and it deserves a central place in any War in the North endgame guide. In the original release, you committed to a character for the entire playthrough unless you started a new game. The 2026 rerelease lets you switch between the three heroes mid-combat, which opens up entirely new tactical possibilities. You can now bring the right tool for every fight without locking yourself into a single playstyle.
Hot-swap mechanics work through a simple input that pauses the action briefly while you select your next hero. The swap is not instant — there is a short animation and a brief vulnerability window — so you cannot treat it as a panic button. Smart players use it proactively: swap to the Ranger for ranged pressure, then switch to the Champion when enemies close the distance. The timing takes practice, but mastering it effectively triples your available toolkit in any given fight.
| Character | Best Role in Endgame | Swap Priority |
|---|---|---|
| Champion | Frontline tank, crowd control, breaking shields | High — engage first, absorb aggro |
| Mage | Ranged DPS, AoE bursts, healing support | Medium — swap in for adds and elites |
| Ranger | Sustained damage, weak-point strikes, utility | Medium — finish off stragglers, boss kiting |
The hot-swap cooldown prevents you from cycling characters every few seconds, so you need to commit to a rhythm. Community testing suggests the cooldown sits around ten seconds, which means you should plan your swaps around enemy attack patterns rather than reacting to them. For example, when a Brute winds up its heavy slam, swap to the Ranger, roll backward, and unload arrows while the Brute recovers. That window is long enough to get meaningful damage in before the cooldown resets.
This system also changes how you approach the endgame gear grind. Since you can now use all three characters in a single fight, you need to keep all three reasonably geared rather than funneling everything into one hero. The damage guide for endgame weapons breaks down which weapon types scale best per character, and that information becomes far more valuable when you can actually swap between them mid-fight. A balanced party with complementary gear outperforms a single over-leveled character in every endgame scenario.
Endgame Resource Management and Consumables
The Legacy Edition's dedicated consumables panel is one of the most underrated additions, and it belongs in every War in the North endgame guide because it directly affects your survival odds. In the original game, managing potions and scrolls meant pausing the action and navigating clunky menus, which often got players killed in the middle of intense fights. The new panel gives you quick access to your full consumable inventory, letting you pop a health potion or trigger a buff without losing sight of the battlefield.
Consumable loadouts matter more in the endgame because enemy damage scales aggressively. A single hit from a late-game Uruk captain can strip half your health bar, so reaction time becomes a survival stat. The dedicated panel reduces that reaction time dramatically, but you still need to stock the right items. Health potions are obvious, but stamina tonics, elemental resistance scrolls, and damage buffs all have their place depending on the encounter.
| Consumable Type | Endgame Priority | When to Use |
|---|---|---|
| Health potions | Critical — always carry max | Any time health drops below 40% |
| Stamina tonics | High — enables sustained combos | Before boss DPS windows |
| Resistance scrolls | Situational — boss-specific | Before elemental-heavy fights |
| Damage buffs | Medium — short windows | After boss staggers or phase transitions |
The consumables panel shortcut is worth remapping to a comfortable button because you will use it constantly in the final chapters. Players who bind it to an easy-to-reach input report far fewer panic deaths than those who leave it on the default mapping. The difference is most noticeable during the game's multi-phase boss fights, where you often need to heal and reposition simultaneously. Being able to chug a potion while dodging is the difference between surviving a phase transition and watching the kill screen.
Resource management also extends to your gold and crafting materials. The endgame vendors sell powerful gear, but they charge premium prices, and you cannot farm unlimited gold in a single playthrough. Prioritize spending on weapon upgrades over armor, because the endgame gear comparison shows that weapon damage scales more dramatically than defensive stats at high levels. A +3 weapon outperforms a +3 armor piece in almost every measurable way, so allocate your upgrade materials accordingly.
Difficulty Scaling and Endgame Progression
The War in the North difficulty guide portion of this article covers how the Legacy Edition's difficulty curve shifts in the endgame, because the final chapters demand a different approach than the early game. The first few hours let you brute-force most encounters with basic combos and occasional potions. By the time you reach the endgame, enemy density increases, attack patterns become more punishing, and the game expects you to use every system at your disposal — hot-swapping, consumables, and environmental awareness.
Enemy scaling in the endgame follows a predictable pattern: more enemies per encounter, higher damage per hit, and new attack patterns that punish greedy play. The game does not simply inflate numbers; it introduces enemy types that counter specific playstyles. For example, shielded Uruks require the Champion's shield-break attacks, while fast skirmishers demand the Ranger's precision shots. This is where the hot-swap system shines, because you can adapt your character to the enemy composition rather than forcing a single approach.
| Difficulty Setting | Enemy Damage Multiplier | Recommended For |
|---|---|---|
| Casual | 0.8x | Story-focused players, first-time playthroughs |
| Normal | 1.0x | Standard experience, balanced challenge |
| Hard | 1.3x | Veterans seeking a challenge, experienced ARPG players |
| Legendary | 1.6x | Completionists, achievement hunters, masochists |
The difficulty selection is not locked, which means you can adjust it mid-playthrough if you find yourself stuck. However, the game tracks your difficulty for certain achievements, so if you are hunting the difficulty-specific achievements, you need to commit to a single setting for the entire run. Lowering the difficulty mid-game disqualifies you from those achievements, even if you raise it back later. Plan your difficulty choice before starting, and stick with it unless you genuinely cannot progress.
Endgame progression also involves revisiting earlier areas with new abilities. The Legacy Edition keeps the original's "Triggering Secrets" system, where certain hidden paths only open once you have specific skills or items. Community reports indicate that several of the best endgame weapons are hidden behind these secrets, so a thorough exploration run before the final missions pays significant dividends. The game does not mark these on your map, so you need to remember environmental details from earlier chapters or follow community guides.
Endgame Errors That Waste Your Progress
Autosave Slot Rotation for Endgame Farming
The Legacy Edition's new autosave system writes to a dedicated slot that rotates independently of your three manual save slots. When farming endgame bosses like Agandaûr for epic weapon drops, the autosave triggers after every zone transition and boss kill, overwriting your previous autosave. To prevent losing a valuable drop to a bad autosave, manually save to a fresh slot before each boss encounter. If the drop is poor, quit to the main menu and reload your manual save—the autosave will not overwrite your manual slot, preserving your farming position.
Consumables Panel Loadout for Extended Dungeon Runs
The dedicated consumables panel in the Legacy Edition UI allows you to bind up to four consumables to quick-access keys, a significant upgrade from the original's cluttered inventory menu. For endgame dungeon runs like the final assault on Gundabad, load your panel with two Greater Healing Draughts, one Elven Waybread for mana restoration, and one Fire Oil for weapon buffs. This loadout sustains roughly 15 minutes of continuous combat without opening the inventory. Compare this to the original game, where accessing a single consumable required pausing combat for 3-4 seconds, often resulting in interrupted attack chains.
Every War in the North new player guide should include a section on common mistakes, because the game does a poor job of explaining its systems upfront. The endgame amplifies these mistakes into run-ending problems, so identifying them early saves you from frustration. The most frequent errors come from players who treat the Legacy Edition like a simple action game rather than an ARPG with meaningful build and resource decisions.
Mistake one: ignoring the hot-swap system. Players who stick with one character miss out on the Legacy Edition's biggest advantage. The game is balanced around having all three heroes available, and the endgame assumes you will swap. If you refuse to engage with the system, you will struggle against encounters that demand specific character abilities. The fix is simple: practice swapping in low-stakes fights until the muscle memory sticks.
Mistake two: hoarding consumables. Many players save their potions "for when they really need them" and then die with a full inventory. The endgame throws enough resources at you that you should use consumables liberally. A health potion used to avoid a death is never wasted, because the gold you save from not dying outweighs the potion's cost. Stock up before every major fight and use them freely.
Mistake three: neglecting side content. The endgame difficulty spike catches players who rushed the main story without completing optional quests and exploring hidden areas. The experience and gear from side content are not optional padding; they are the difference between entering the final chapters at an appropriate level versus being woefully underpowered. If you are struggling, go back and clear the content you skipped.
Mistake four: poor save discipline. The autosave system is helpful, but it is not a substitute for manual saves. Players who rely on autosave alone often find themselves locked into bad situations with no way to rewind. The War in the North endgame guide's rotating slot strategy prevents this, but only if you actually implement it. Take thirty seconds before each major encounter to save manually; the time investment is trivial compared to the hours you might lose otherwise.
| Mistake | Consequence | Prevention |
|---|---|---|
| Ignoring hot-swap | Hard walls on specific encounters | Practice swapping in early game |
| Hoarding consumables | Deaths with full inventory | Use potions liberally, restock often |
| Skipping side content | Under-leveled for endgame | Clear optional quests before final chapters |
| Poor save discipline | Lost progress, locked-in bad states | Rotate three manual save slots |
Frequently Asked Questions
How does the autosave system work in the Legacy Edition?
The autosave triggers at chapter transitions, major story beats, and specific checkpoints before significant encounters. It does not overwrite your manual save slots, giving you effectively more save points than the original game. However, autosave alone is risky because it can lock you into a bad state after a difficult boss fight.
What is the best save slot strategy for the endgame?
Maintain three rotating manual slots: one at the start of each act, one before major boss fights, and one for current progress. This gives you maximum flexibility to rewind if you make a poor skill choice, miss a collectible, or get stuck on a difficult encounter. The Legacy Edition's expanded slot count makes this strategy easy to implement.
Can I change difficulty mid-playthrough without losing achievements?
You can change difficulty at any time, but doing so disqualifies you from difficulty-specific achievements. If you are hunting the Legendary completion achievements, you must commit to that difficulty for the entire run. Plan your difficulty before starting and stick with it unless you genuinely cannot progress.
How important is the hot-swap system for endgame content?
The hot-swap system is essential for endgame success. The final chapters introduce enemy compositions that counter specific playstyles, and swapping between the Champion, Mage, and Ranger lets you adapt to any situation. Players who ignore this system will struggle significantly against late-game encounters.
What are the most common mistakes new players make?
The biggest mistakes are ignoring hot-swapping, hoarding consumables, skipping side content, and relying solely on autosave. Each cripples endgame progression, so practice character swaps, use potions liberally, clear optional content, and rotate save slots. The Legacy Edition's dedicated consumables panel and expanded slots exist to prevent these pitfalls—use them early.