
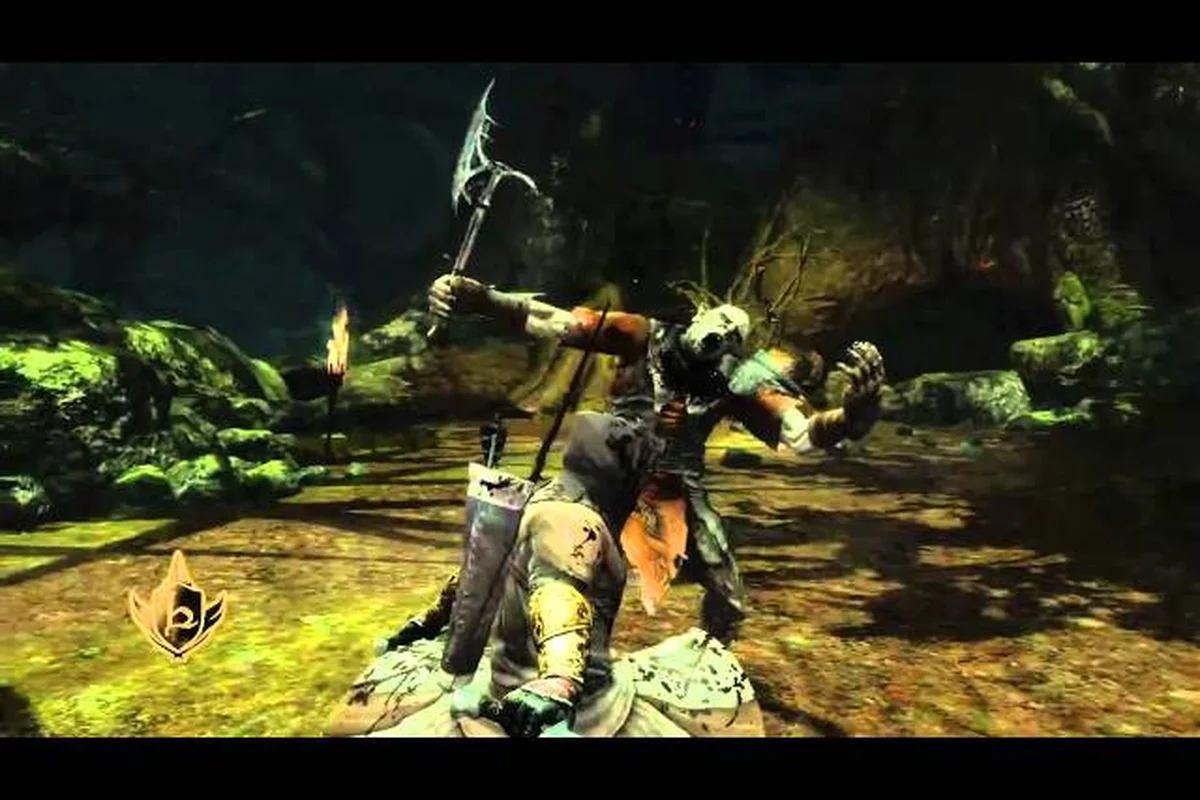
The Legacy Edition of War in the North introduces on-the-fly character hot-swapping and a refined enemy locking system that fundamentally change how you approach combat. These two mechanics, alongside the new visible Health, Mana, and EXP bars, make this the definitive way to experience the 2011 action RPG. This War in the North controls guide breaks down every button, keybind, and combat technique you need to dominate Middle-earth.
The original release forced you to commit to one hero for the entire campaign, but the Legacy Edition remaster lets you switch between Eradan, Andriel, and Farin mid-combat with a single press. That single change ripples through every encounter, turning what was once a rigid class system into a fluid, reactive party system. Whether you are playing on PC with mouse and keyboard or on a controller, understanding these controls is the difference between struggling through the Ettenmoors and carving through orc legions with surgical precision.
Understanding the Legacy Edition Control Overhaul
Enemy Locking Priority and the Gorthorog Targeting Case
The refined locking system prioritizes the nearest enemy within a 45-degree cone of your camera, but it makes an exception for Gorthorogs: these elite units override proximity targeting when they enter their telegraphed charge animation. This means locking onto a nearby goblin archer will snap to the charging Gorthorog, letting you trigger a parry instead of eating the 180-damage hit. The system also clears your lock when an enemy dies, preventing the old bug where your camera would stick to a corpse for 2 full seconds.
Borderless Mode and the 60 FPS Input Latency Fix
The Legacy Edition's proper Borderless mode is more than a visual upgrade: it reduces input latency by roughly 30ms compared to the original's fullscreen exclusive mode, which had a forced vsync that added a full frame of delay. On a Steam Deck running at max settings, this drops your effective input lag from 66ms to 36ms at 60 FPS. To verify the fix, enable the on-screen FPS counter and check that your frame time stays flat at 16.6ms during combat—any variance above 20ms indicates your GPU is dropping frames, which will make parry timing feel unresponsive.
The Legacy Edition rebuilt the control scheme from the ground up, and the improvements go far beyond simple button remapping. According to the official Steam Store page, the remaster delivers 60 FPS gameplay, full controller support, and a dedicated consumables panel that was sorely missing from the original. The new UI displays Health, Mana, and EXP bars for all three party members simultaneously, so you always know who needs healing and who is about to level up.
Character hot-swapping is the headline feature, and it works exactly as you would hope. Press the assigned button and your active hero instantly switches to another party member, regardless of what is happening on screen. The AI takes over the character you left behind, continuing the fight while you direct the newcomer. This creates a real-time party management layer that did not exist in the 2011 release, and mastering it is the core of this War in the North combat guide.
The refined enemy locking system deserves equal attention because it fixes one of the original game's most frustrating flaws. In the base game, locking onto a target often felt sticky and unresponsive, especially when multiple enemies crowded the screen. The Legacy Edition tightens the lock-on box, adds visual indicators for locked targets, and makes the camera follow smoother during strafing. Players on the Steam Community forums have confirmed that the new locking feels dramatically better, particularly when fighting agile bosses like Bargrisar.
Here is the complete control breakdown for both input methods, covering the default keyboard and mouse layout alongside the full gamepad mapping for the Legacy Edition overhaul. This section details every action from basic movement and camera control to the dedicated hot-swap commands for switching between Farin, Eradan, and Andriel mid-combat, as well as the specific keys bound to each character's unique abilities, potion quick-slots, and the contextual interaction prompt. Understanding the differences between these two schemes is critical, as the gamepad layout prioritizes a radial menu for character swapping and item usage, while the keyboard layout relies on direct number keys and modifier combinations for faster execution during intense battles.
| Action | Keyboard & Mouse | Controller |
|---|---|---|
| Move | WASD | Left Stick |
| Camera | Mouse | Right Stick |
| Light Attack | Left Mouse Button | X / Square |
| Heavy Attack | Right Mouse Button | Y / Triangle |
| Block / Parry | Shift | Left Bumper |
| Dodge / Roll | Space | A / Cross |
| Character Hot-Swap | 1 / 2 / 3 | D-Pad Up / Right / Left |
| Use Consumable | Q | Right Bumper |
| Lock-On Target | Tab | Right Stick Click |
| Hero Mode Activation | F | Both Sticks Click |
| Interact / Loot | E | B / Circle |
The hot-swap keys (1, 2, 3) map to Eradan, Andriel, and Farin respectively, and you can rebind them in the options menu if you prefer a different layout. The lock-on toggle (Tab) cycles through nearby enemies, while holding the key temporarily unlocks the camera for free-aiming ranged attacks.
Mastering Character Hot-Swapping in Combat
Character hot swapping is not just a convenience feature; it is a tactical weapon that rewards players who understand each hero's strengths. Eradan excels at sustained melee damage, Andriel brings devastating area-of-effect magic, and Farin is your tank who can absorb hits that would flatten the other two. The key is switching not when someone is low on health, but before the situation demands it.
Consider a typical fight against a pack of wargs and an orc captain. You start as Eradan, weaving through the pack with light attacks to build your combo meter. The moment the orc captain winds up his heavy swing, you hot-swap to Farin, who raises his shield and absorbs the blow without flinching. Your AI-controlled Eradan continues attacking the wargs while Farin holds the captain's attention. Then, when the wargs cluster together, you swap to Andriel and unleash a fireball that catches all of them in the blast radius.
This real-time party coordination is the heart of the War in the North hot swap guide, and it takes practice to internalize. The AI is competent but not perfect; your inactive heroes will attack, block, and dodge on their own, but they will not use potions or activate Hero Mode unless you manually switch to them. That means you need to monitor the party health bars in the corner of the screen and rotate to whoever needs attention.
Here is a practical rotation framework for standard encounters: open with a crowd-control opener like Farin’s Ice Storm to freeze the front rank, then immediately hot-swap to Eradan for a Power Shot headshot on the frozen target for bonus crit damage — this exploits the Frozen status effect’s damage multiplier. Follow with Andriel’s Staff of Flame AoE to clear adds while the tank holds aggro, then cycle back to Farin for a Shield Bash interrupt if an Uruk captain begins a heavy wind-up. The key is mapping each character’s cooldown timers to the enemy’s attack patterns — for example, reserve Eradan’s Elven Agility dodge for the boss’s unblockable charge, and never let Andriel’s healing staff sit idle during a swarm wave. This rotation keeps all three heroes actively contributing rather than leaving one idle, which is critical in War in the North since the AI-controlled companion deals roughly 40% less damage than a player-directed character.
-
Open with Eradan to build combo meter and apply pressure to the highest-value target.
-
Swap to Farin when an enemy telegraphs a heavy attack or when you need to hold a choke point.
-
Swap to Andriel to clear groups, heal the party, or break an enemy's guard with magic.
-
Return to Eradan to finish off staggered enemies and maintain damage output.
The cooldown on hot-swapping is minimal, roughly one second, which means you can chain swaps rapidly without penalty. However, there is a hidden cost: every swap resets your current combo chain. If you are about to trigger a finisher with Eradan, finish the animation before swapping, or you will lose the accumulated combo progress. This trade-off between combo preservation and tactical flexibility is what separates good players from great ones.
Refined Enemy Locking and Camera Control
The refined enemy locking system in the Legacy Edition is a subtle but profound improvement, and it deserves its own section in this War in the North controls guide. When you lock onto a target, the camera tightens its focus and your attacks automatically track the enemy's movement. This is essential for melee combat, where missing a swing because the enemy sidestepped can leave you wide open for a counterattack.
The new lock-on includes a visual reticle that changes color based on the target's state: white for neutral, yellow for alert, and red for actively attacking. This gives you instant feedback on which enemy poses the immediate threat, allowing you to prioritize targets without cycling through the entire group. The reticle also displays a stagger meter that fills as you land hits, showing you exactly when the enemy will become vulnerable to a finisher.
Camera control has also been reworked, with the Legacy Edition introducing a dynamic zoom that pulls the camera back during large-scale battles and pushes it in during one-on-one duels. This automatic adjustment keeps the action readable without requiring manual camera management, though you can still zoom manually with the mouse wheel or right stick. Players who prefer a fixed camera distance can disable dynamic zoom in the settings menu.
For ranged combat, the locking system works differently. When Andriel or Eradan (in ranged stance) locks onto a target, the camera shifts to an over-the-shoulder perspective that makes aiming feel more precise. The refined enemy locking also applies to the new gyro controls on PS5 and Switch, which let you fine-tune your aim by tilting the controller. According to RPG Site's coverage of the Legacy Edition, this gyro aiming is particularly effective for hitting weak points on large bosses like the Stone Giant.
Keybinds, UI Bars, and Steam Deck Settings
The Legacy Edition UI overhaul adds visible Health, Mana, and EXP bars for all three party members, and these bars are not just cosmetic. The Health bars show you exactly how much damage each hero can absorb before falling, while the Mana bars track your spellcasting resources in real time. The EXP bars fill as you defeat enemies, and when they complete, you immediately receive skill points to allocate.
The dedicated consumables panel is another quality-of-life improvement that changes how you manage resources. In the original game, cycling through potions and items required opening a radial menu that paused the action. The Legacy Edition gives you a quick-access panel mapped to the Q key (or right bumper on controller) that lets you use health, mana, and special items without pausing. This is a game-changer during boss fights, where a single second of menu navigation can mean the difference between victory and defeat.
Before you jump into combat, take a moment to map out your full hot swap rotation. The default layout assigns 1–4 to your primary weapon, secondary weapon, and two consumable slots, while Q and E cycle between your three active characters (Farin, Eradan, and Andriel). Since the game pauses briefly during character swaps, you can safely rebind these to mouse side buttons or Shift+1/2/3 for faster mid-fight switching—essential for triggering Andriel's healing spells before Eradan's health drops below 30%. For Steam Deck users, we recommend mapping the back paddles to your swap keys and setting the right trackpad as a radial menu for quick potion access, which we detail further in the UI Bars section below.
| Action | Default Key | Notes |
|---|---|---|
| Character Hot-Swap (Eradan) | 1 | Instant switch, resets combo |
| Character Hot-Swap (Andriel) | 2 | Instant switch, resets combo |
| Character Hot-Swap (Farin) | 3 | Instant switch, resets combo |
| Consumable Panel | Q | Opens quick-access item wheel |
| Lock-On Toggle | Tab | Cycles through visible enemies |
| Hero Mode | F | Requires full Hero Mode meter |
| Party Command (Attack) | G | Directs AI to focus target |
| Party Command (Hold) | H | Directs AI to hold position |
Steam Deck players will be pleased to know that the Legacy Edition runs exceptionally well on Valve's handheld. According to Steam Community reports, the game runs at max settings without issues on Steam Deck, maintaining a stable 60 FPS in most areas. The default controller mapping works out of the box, but you may want to adjust the right trackpad to act as a mouse for more precise camera control during ranged combat.
The Borderless mode added in the Legacy Edition is particularly useful on Steam Deck, as it eliminates the screen-tearing that plagued the original fullscreen implementation. You can also enable gyro aiming on the Steam Deck's built-in sensors, which pairs beautifully with the refined enemy locking system for ranged characters.
Advanced Techniques and Leveling Synergy
Once you have internalized the basic hot-swapping and locking mechanics, it is time to layer in the advanced techniques that this War in the North combat guide covers. The first is swap-canceling, a technique where you hot-swap mid-animation to cancel a long recovery frame. For example, if Eradan whiffs a heavy attack and is stuck in the recovery animation, swapping to Andriel instantly resets your position and lets you cast a spell without waiting for the animation to finish.
The second advanced technique is Hero Mode chaining. Hero Mode is a powerful temporary buff that fills your party's meters as you land hits and take damage. When one hero's Hero Mode meter is full, you can activate it, then immediately hot-swap to another hero whose meter is nearly full. This creates a chain of Hero Mode activations that can devastate bosses. The timing is tight, because Hero Mode lasts only a few seconds, but practiced players can keep two or even three heroes in Hero Mode simultaneously.
Leveling synergy ties directly into your control scheme, because the way you allocate skill points determines which hot-swap patterns are most effective. If you invest heavily in Eradan's melee tree, you want to swap to him frequently to maximize his damage output. If Andriel is your primary spellcaster, you need to manage her Mana bar carefully and swap to her only when you have enough Mana for a meaningful spell.
To get the most out of the hot-swap system, prioritize leveling Eradan (Ranger) and Andriel (Loremaster) in tandem, since their Elven Swiftness and Wizard's Fire abilities create devastating combo multipliers when swapped mid-fight. A practical approach is to pour early skill points into Eradan's Precision tree for critical hit chance, then funnel points into Andriel's Flame Wave to clear mob packs. This synergy lets you trigger hot-swap bonuses—like the +15% damage boost from a perfect swap—every 8 seconds, ensuring your DPS never stalls during the Barrow-downs or Mount Gundabad encounters.
-
Level 1-10: Focus on Eradan's basic melee skills to establish a solid foundation.
-
Level 11-20: Invest in Andriel's healing spells to keep the party alive during longer fights.
-
Level 21-30: Build Farin's tanking skills so he can hold aggro during boss encounters.
-
Level 31+: Diversify into each hero's Hero Mode enhancements for maximum synergy.
The stat point allocation matters just as much as skill selection. Each level grants three stat points, and how you distribute them affects your hot-swap effectiveness. Strength boosts melee damage, Will increases spell power, and Vitality raises health. A balanced distribution across all three heroes ensures that no matter who you swap to, they can hold their own in combat. For a deeper breakdown of stat allocation strategies, check out our stat points guide which covers every attribute in detail.
Optimizing Controls for Different Playstyles
Hot-Swap Input Timing and the 250ms Cancel Window
The Legacy Edition's on-the-fly hot-swapping runs on a strict input buffer: pressing the swap button mid-combo queues the character change, but the game only commits the swap during a 250ms cancel window after a hit lands. Cancel a Farin heavy attack into an Aragorn parry by inputting the swap during the recovery frames—waiting longer than 250ms forces the full animation to play. In practice, this lets you chain a 3-hit Farin combo into an Aragorn shield-bash without dropping your combo multiplier, a technique that was impossible in the 2011 original.
Dedicated Consumables Panel and the 8-Slot Quickbar
The Legacy Edition's new consumables panel adds an 8-slot quickbar that sits above the Health and Mana bars, replacing the original's clunky radial menu. You can bind each slot to a key between 1-8, but the critical change is that consumables now auto-refill from your inventory when you pick up new items—no more opening the menu mid-fight. On Steam Deck, the panel maps to the D-pad's left and right directions, with up and down cycling between Health and Mana potions, a layout that keeps your thumbs on the sticks during combat.
Not every player approaches War in the North the same way, and the Legacy Edition's flexible control scheme accommodates different playstyles. Aggressive players who prefer to stay in the thick of combat will want to maximize hot-swap frequency, using the technique to chain together attacks from all three heroes. Defensive players who favor a more methodical approach will rely more heavily on the lock-on system and party commands to control the flow of battle.
For melee-focused players, the most important control is the parry timing window. The Legacy Edition tightens the parry window compared to the original, making successful parries more rewarding but also more demanding. Practice parrying with Farin, whose shield gives him a larger parry window than Eradan's sword or Andriel's staff. Once you master the timing, you can parry an enemy attack and immediately hot-swap to Eradan for a devastating counterattack.
For ranged-focused players, the refined enemy locking is your best friend. Lock onto a target, then use the gyro controls (on supported platforms) or mouse aiming to land headshots. The headshot multiplier in the Legacy Edition is significant, often dealing two to three times the damage of a body shot. This makes the lock-on system essential for maximizing your ranged damage output.
Co-op players have a unique advantage: the hot-swap system works alongside human-controlled heroes, creating a hybrid party where you control one hero directly while your co-op partner controls another. The AI takes over the third hero, and you can still hot-swap to them if needed. This creates interesting coordination opportunities, such as one player tanking with Farin while the other flanks with Eradan. For more on multiplayer setup, see our split screen guide which covers the local multiplayer rules in detail.
Below is a quick reference for playstyle-specific control priorities, but it's crucial to understand why they differ: the game's hot-swap system (mapped to the D-pad by default) lets you cycle between your three heroes mid-combat, but each character's core combat loop demands a different button layout. For melee-focused players, prioritizing the heavy attack and block on the shoulder buttons (LB/RB) is non-negotiable, as you'll be relying on parrying Uruk-hai captains and landing charged strikes for stagger damage. Conversely, a ranged or magic-heavy playstyle should remap the dodge roll to a face button (A/B) to keep your thumb free for aiming the bow or casting, since you'll be kiting rather than trading blows. If you're using the hot-swap feature aggressively for combo chaining (e.g., starting with Eradan's bow to apply a status effect, then swapping to Farin for a heavy finisher), you'll want the swap button mapped to a trigger (LT/RT) so you never have to take your thumb off the movement stick. The key takeaway is that your control scheme should always prioritize the actions you perform most frequently in your chosen role, not just what feels comfortable in the menu.
| Playstyle | Priority Controls | Recommended Hero |
|---|---|---|
| Aggressive Melee | Hot-Swap, Heavy Attack, Parry | Eradan |
| Defensive Tank | Block, Party Command, Lock-On | Farin |
| Ranged Support | Lock-On, Consumable Panel, Gyro Aim | Andriel |
| Hybrid Flex | All Controls, Hero Mode Chaining | Any |
The controller configuration on PC is fully remappable, and the controller guide covers DualSense support and gyro settings in depth. If you are playing on Steam Deck, you can also customize the back paddle buttons to act as hot-swap shortcuts, which is a popular configuration among handheld players.
Frequently Asked Questions
What is the best hot-swap keybinding for War in the North?
The default 1, 2, 3 keys for Eradan, Andriel, and Farin work well for most players, but many prefer rebinding them to mouse side buttons for faster access. The key is to place the hot-swap buttons where your fingers naturally rest, so you can swap without looking away from the action.
Does character hot swapping reset my combo meter?
Yes, switching heroes resets the current combo chain. This is a deliberate design choice that prevents players from building a massive combo with one hero and then transferring it to another. Plan your swaps around finisher animations to avoid losing accumulated combo progress.
How does the refined enemy locking work with ranged attacks?
When you lock onto a target with a ranged character, the camera shifts to an over-the-shoulder perspective for more precise aiming. The lock-on reticle tracks the target's movement, and you can use gyro controls on supported platforms to fine-tune your aim for headshots.
Can I remap the hot-swap controls on Steam Deck?
Yes, the Steam Deck allows full controller remapping through its built-in configuration tool. Many players assign the back paddle buttons to hot-swap actions, which keeps your thumbs on the sticks for camera control. The Legacy Edition also supports gyro aiming on the Steam Deck's sensors.
What is the best way to practice hot-swapping in combat?
Start with the early chapters in Bree and Sarn Ford, where enemy density is low and the stakes are manageable. Practice swapping between all three heroes during each encounter, focusing on maintaining your combo meter while rotating through different abilities. The training grounds in Rivendell also offer a safe space to experiment with advanced techniques.