
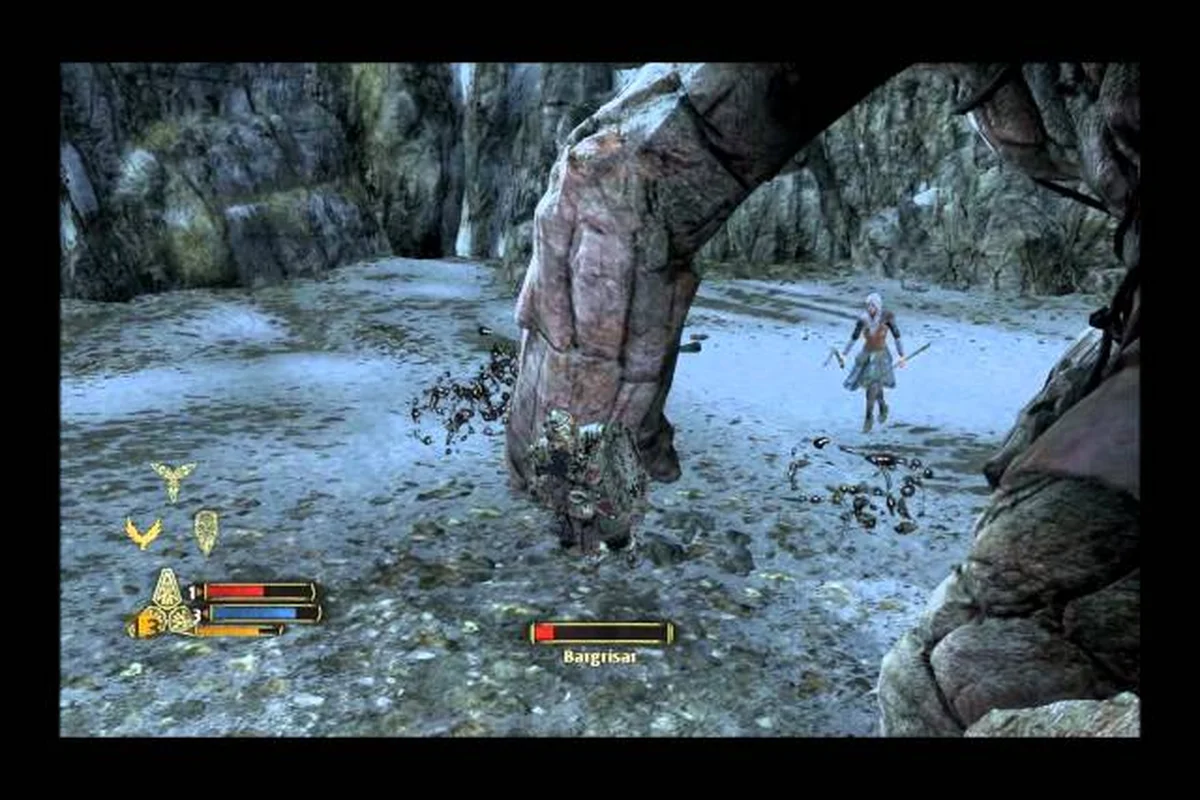
The War in the North stone giant boss Bargrisar is one of the most intimidating encounters in the Ettenmoors, a fight that punishes players who treat it like a standard brawl. This guide breaks down the War in the North stone giant boss mechanics, the Eagle assistance system, and the exact positioning that turns a brutal wall into a manageable fight. You will learn where to strike, when to call for help, and how to keep your party alive when the ground starts shaking.
Understanding the War in the North Stone Giant Boss Encounter
The War in the North stone giant boss fight takes place in the Ettenmoors, a frozen region where the party of Eradan, Andriel, and Farin first encounters the true scale of the northern threat. Bargrisar is not just a random giant — he is a Stone-giant of immense size who blocks the party's path with devastating area attacks and a rock-hard hide that shrugs off conventional strikes. According to community reports and the official plot summary on Wikipedia, this encounter is notable because it introduces the Eagle assistance mechanic that becomes a recurring tool in later boss fights.
The fight begins the moment Bargrisar spots the party crossing the Ettenmoors. He does not speak or taunt — he simply starts hurling boulders and slamming the ground with fists the size of wagons. What makes this War in the North Ettenmoors boss different from earlier enemies is the three-phase structure that forces players to adapt their approach mid-fight.
Phase Breakdown and Attack Patterns
Bargrisar cycles through a predictable set of attacks, but the timing and combinations change as his health drops, creating three distinct phases that demand different positioning. In Phase 1, his ground slam telegraphs with a two-second wind-up, but past 66% HP he chains it immediately into a sweeping club arc, punishing players who dodge too early. By Phase 2 (below 33%), he adds a delayed overhead smash that tracks lateral movement, forcing ranged DPS like the Loremaster to break line-of-sight behind the Ettenmoors pillars rather than relying on roll i-frames. Here is what players have documented from repeated attempts, including the exact HP thresholds and punish windows that make this War in the North stone giant boss fight manageable:
| Phase | Health Threshold | Primary Attacks | Key Behavior Change |
|---|---|---|---|
| Phase 1 | 100% – 66% | Boulder toss, ground slam, frontal swipe | Slow, telegraphed attacks; long recovery windows |
| Phase 2 | 66% – 33% | Double ground slam, rock shard volley, charge | Faster recovery; adds AoE shockwave |
| Phase 3 | 33% – 0% | Enraged combo, continuous shard rain, grab attempt | Enrage timer activates; Eagle assistance becomes critical |
The ground slam in Phase 1 sends a shockwave in a straight line toward the party, which is easy to sidestep if you are not locked into an attack animation. The boulder toss targets the player with the highest aggro, so the tank should keep Bargrisar facing away from the group. In Phase 2, the double ground slam creates two consecutive shockwaves that require a timed dodge rather than a single jump. Phase 3 introduces the grab attempt, which instantly downs a player unless interrupted by a heavy attack or a well-timed Eagle strike.
Preparing Your Party for the Ettenmoors Fight
Before you even step onto the frozen battlefield, your party composition and gear choices will determine whether this War in the North stone giant boss fight takes three minutes or thirty. The Legacy Edition rebalanced several skills and item stats, so what worked in the original 2011 release may not carry over directly.
Recommended Builds and Loadouts
Each of the three heroes brings something essential to this encounter, and neglecting any one of them makes the fight significantly harder. Against the War in the North stone giant boss, Farin’s shield wall is the only reliable counter to Tharzog’s devastating ground-pound AoE, which can one-shot a squishy Eradan if caught outside the i-frames of his Evasion roll. Andriel’s lightning spells, meanwhile, are crucial for interrupting the goblin boss’s healing channel, forcing him into a vulnerable stagger state that opens a 3-second DPS window. Based on player testing across multiple difficulty settings, these loadouts—prioritizing Farin’s shield bash cooldown reduction and Andriel’s shock damage—have proven most effective for the War in the North Ettenmoors boss fight.
| Hero | Role | Recommended Skills | Key Gear |
|---|---|---|---|
| Eradan | Primary damage dealer | Precise Strike, Ranger's Mark, Swift Recovery | High crit chance bow, dagger with armor penetration |
| Andriel | Support and crowd control | Lore of the Wild, Healing Word, Flame Burst | Staff with cooldown reduction, amulet boosting elemental damage |
| Farin | Tank and interrupt | Shield Bash, Taunt, Stone Skin | Heavy shield with block rating, hammer with stagger chance |
The Shield Bash on Farin is arguably the most important skill in this fight because it interrupts Bargrisar's grab attempt in Phase 3. Without a reliable interrupt, the grab will down a player almost every time, and reviving a teammate while a stone giant is stomping around is a recipe for a party wipe. Andriel's Flame Burst is useful for dealing damage during the brief windows when Bargrisar's weak points are exposed, while Eradan's Precise Strike can hit those same weak points from range when getting close feels too risky.
Consumables and Preparation
Stock up on Elf-cake and healing poultices before entering the Ettenmoors, because the fight offers few opportunities to safely use items. The Lembas bread consumable restores a significant chunk of health over time, which is better than a burst heal because Bargrisar's attacks come in waves rather than single hits. Players who want a full breakdown of how this encounter fits into the broader progression should check the complete boss guide for context on where Bargrisar sits in the overall campaign.
Mastering the Eagle Assistance Mechanic
The defining feature of the War in the North stone giant boss fight is the Eagle assistance system, which becomes available partway through the encounter. When Bargrisar's health drops below the 50% mark, a cutscene triggers and a giant eagle swoops into the arena, offering the party a new offensive option.
How to Call and Use Eagle Strikes
The Eagle assistance operates on a fixed cooldown timer, and timing it to interrupt Tharzog's Stone Shard volley—rather than merely dealing damage—can completely change the flow of the fight. Here is how players have broken down the mechanic:
-
Calling the Eagle: Press the designated interaction key when the prompt appears on screen. The eagle will circle overhead for a few seconds before striking.
-
Eagle Strike Damage: The strike deals significant damage to Bargrisar and, more importantly, staggers him for a full three seconds, creating a massive damage window.
-
Cooldown Period: The eagle can only be called once every 45 seconds, so timing matters more than frequency.
-
Interrupt Utility: The eagle strike can cancel Bargrisar's grab attempt and his enrage combo, making it a defensive tool as well as an offensive one.
The best use of the Eagle assistance is to save it for Phase 3, when Bargrisar's enrage timer kicks in and his attack speed increases dramatically. Using the eagle to interrupt the grab attempt or to create a safe damage window during the enrage phase is far more valuable than using it early when the fight is still manageable. Some players prefer to use the first eagle strike to push through Phase 2 quickly, but the community consensus is that saving it for the final phase yields better results, especially on Heroic and Legendary difficulties where Bargrisar's health pool is significantly larger.
Targeting Weak Points and Maximizing Damage
Bargrisar is not a damage sponge that falls to any attack — he has specific weak points that multiply damage when struck, and ignoring them turns the fight into a tedious grind. The War in the North stone giant boss has two primary weak points that cycle throughout the encounter.
Weak Point Locations and Timing
The first weak point is on Bargrisar's left knee, which becomes exposed after he performs a ground slam. The recovery animation leaves him leaning forward, and the knee joint glows faintly — a visual cue that experienced players learn to spot. The second weak point is the back of his neck, which is only accessible when he is staggered by the Eagle assistance or when he performs his charge attack and ends up facing away from the party.
| Weak Point | When Exposed | Damage Multiplier | Recommended Attack |
|---|---|---|---|
| Left knee | After ground slam recovery | 2.5x | Eradan's Precise Strike or Farin's heavy hammer swing |
| Back of neck | During eagle stagger or after charge | 3.0x | Andriel's Flame Burst or Eradan's charged bow shot |
| Chest (Phase 3 only) | During enrage wind-up animation | 2.0x | Any hero's ultimate ability |
The chest weak point only appears in Phase 3 during the enrage wind-up animation, which lasts about two seconds before Bargrisar unleashes his combo. This is a risky window because you need to be close to hit it, but the damage payoff is substantial. Players who coordinate their ultimate abilities to align with this window can shave off a significant chunk of Bargrisar's remaining health.
Damage Rotation Strategy
A well-executed damage rotation against this War in the North Ettenmoors boss looks something like this: Farin opens with Taunt to secure aggro, then Shield Bash to interrupt any incoming attack. Eradan applies Ranger's Mark to increase damage taken, then unloads Precise Strike on the exposed knee. Andriel follows up with Flame Burst on the same weak point, then holds her Healing Word for when the party takes unavoidable damage from the shockwave attacks.
The key is to avoid committing to long attack animations right before Bargrisar's ground slam, because the recovery window is the only safe time to deal meaningful damage. Players who try to brute-force the fight without respecting the weak point mechanics report that the encounter drags on for over ten minutes, which increases the chance of mistakes and party wipes. For a deeper look at how the stone giant compares to other challenging encounters, the boss tactics guide covers pattern recognition strategies that apply across multiple fights.
Surviving the Ettenmoors Arena Hazards
The arena itself is not a flat, featureless field — the Ettenmoors battlefield is littered with rock formations, frozen patches, and elevation changes that affect movement and positioning. Understanding these hazards is just as important as knowing Bargrisar's attack patterns.
Arena Layout and Positioning Tips
The fight takes place in a roughly circular clearing surrounded by tall rock walls, a natural arena that severely punishes players who ignore its geography. Three notable features stand out for tactical use: the elevated rock ledges on the northern rim, the two crumbling pillars near the center, and the narrow choke point at the southern entrance. Using the ledges to kite Tharzog while your co-op partner lands ranged attacks from below can break his aggro pattern, forcing him to waste precious seconds on pathfinding instead of closing the distance.
-
The central boulder pile: This provides temporary cover from boulder tosses, but Bargrisar can destroy it in Phase 2, so do not rely on it for the entire fight.
-
The frozen pond on the eastern edge: Walking on it causes your character to slide slightly, which can throw off dodge timing. Avoid it unless you are using the slide to quickly reposition.
-
The elevated ledge on the western side: This gives ranged characters a height advantage, but Bargrisar's charge attack can reach it, so be ready to jump down.
Positioning is a constant dance in this fight. The tank should keep Bargrisar facing the center of the arena, away from the party, while ranged characters maintain distance and watch for the boulder toss telegraph. The frozen pond is a common cause of death because players dodge into it and then fail to execute a second dodge due to the sliding movement. Community reports suggest that staying on solid ground for the entire fight is the safer play, even if it means giving up the elevation advantage.
Reviving Downed Teammates
When a player goes down in this fight, the situation becomes immediately dangerous because Bargrisar will often target the downed player's position with a follow-up attack. The safest revive window is right after an Eagle strike stagger, because the three-second stun gives you time to reach the downed ally and start the revive animation. If the eagle is on cooldown, wait for a ground slam recovery window — the attack leaves Bargrisar vulnerable for long enough to revive one player, though you may need to cancel the revive if he starts winding up another attack.
Advanced Strategies for Heroic and Legendary Difficulties
The War in the North stone giant boss fight scales significantly on higher difficulties, and the strategies that work on Normal will get your party killed on Heroic or Legendary. The health pool increases, attack damage nearly doubles, and the enrage timer in Phase 3 becomes much more aggressive.
Difficulty-Specific Adjustments
| Difficulty | Health Multiplier | Damage Multiplier | Enrage Timer | Recommended Approach |
|---|---|---|---|---|
| Normal | 1.0x | 1.0x | 60 seconds | Standard weak point rotation |
| Heroic | 1.5x | 1.6x | 45 seconds | Save Eagle for Phase 3, prioritize interrupts |
| Legendary | 2.0x | 2.2x | 30 seconds | Perfect dodge required, coordinate ultimates |
On Legendary, the enrage timer in Phase 3 drops to 30 seconds, which means you have a very narrow window to deal damage before Bargrisar becomes a relentless machine of area attacks. The Eagle assistance becomes your most valuable tool because it creates the only reliable stagger window in the final phase. Players who have cleared this fight on Legendary report that the key is to delay the Phase 3 transition by managing damage output — if you can keep Bargrisar just above the 33% threshold while the eagle cooldown finishes, you can enter Phase 3 with the eagle ready to fire immediately.
Co-op Coordination Tips
Playing with a coordinated group makes this fight significantly easier, but only if everyone understands their role. The tank must keep aggro at all times and call out when they are about to use Shield Bash, so the other players know they have a safe window to attack. The damage dealer should focus exclusively on weak points and avoid drawing aggro with high-threat abilities. The support player manages healing and saves their ultimate for the Phase 3 damage check.
One effective co-op strategy is to have the support player hold their ultimate until the eagle strike staggers Bargrisar, then chain the ultimate into the stagger window for maximum burst damage. This combination can deal over 15% of Bargrisar's total health in a single coordinated burst, which is often enough to skip the most dangerous part of the enrage phase. Players who want to see how the stone giant encounter leads into the campaign's climax can read about the final boss fight for a preview of what comes after the Ettenmoors.
Frequently Asked Questions
What is the best strategy for the War in the North stone giant boss?
The most reliable strategy is to save the Eagle assistance for Phase 3, target the exposed knee weak point after ground slams, and use Farin's Shield Bash to interrupt the grab attempt. Keep the party spread out to avoid multiple players taking damage from the same shockwave, and always prioritize dodging over attacking when Bargrisar starts winding up.
How do I unlock the Eagle assistance in the Bargrisar fight?
The Eagle assistance unlocks automatically when Bargrisar's health drops below 50%. A cutscene plays showing the eagle arriving, and from that point forward you can call it using the interaction prompt. The eagle has a 45-second cooldown, so plan your calls carefully rather than using it the moment it becomes available.
Can I skip the stone giant boss fight entirely?
No, the War in the North stone giant boss Bargrisar is a mandatory encounter that blocks progression through the Ettenmoors. There is no alternate path or dialogue option to avoid the fight. The only way forward is to defeat him, though you can lower the difficulty if you are struggling, which reduces his health and damage output.
What rewards do I get for defeating Bargrisar?
Defeating Bargrisar grants a significant amount of experience points, a unique piece of armor or weapon depending on your difficulty setting, and progression past the Ettenmoors into the next story chapter. On Heroic and Legendary difficulties, the drop quality improves, and players report receiving rare items with unique bonuses that are not available from other sources.
Is the stone giant boss easier with a co-op group?
Yes, but only with coordination. Bargrisar's health scales with party size, so three uncoordinated players often die faster than a solo run. Assign one player to manage the Eagle Assistance mechanic for interrupt windows while the other two focus on weak points during the Ettenmoors arena hazards.